Pages
Pages in Blog-Doc are used to create nonchronological content that does not change very often such as "About" or "Contact" pages, or even content that you don't want to list chronologically in relation to the rest of your site such as "Documentation".
To start creating, you have to access the administration interface by clicking on the Admin ⚡ link from the front-end of the application.

Once in the administration interface, click on the Add new link under the Pages section to create a page.
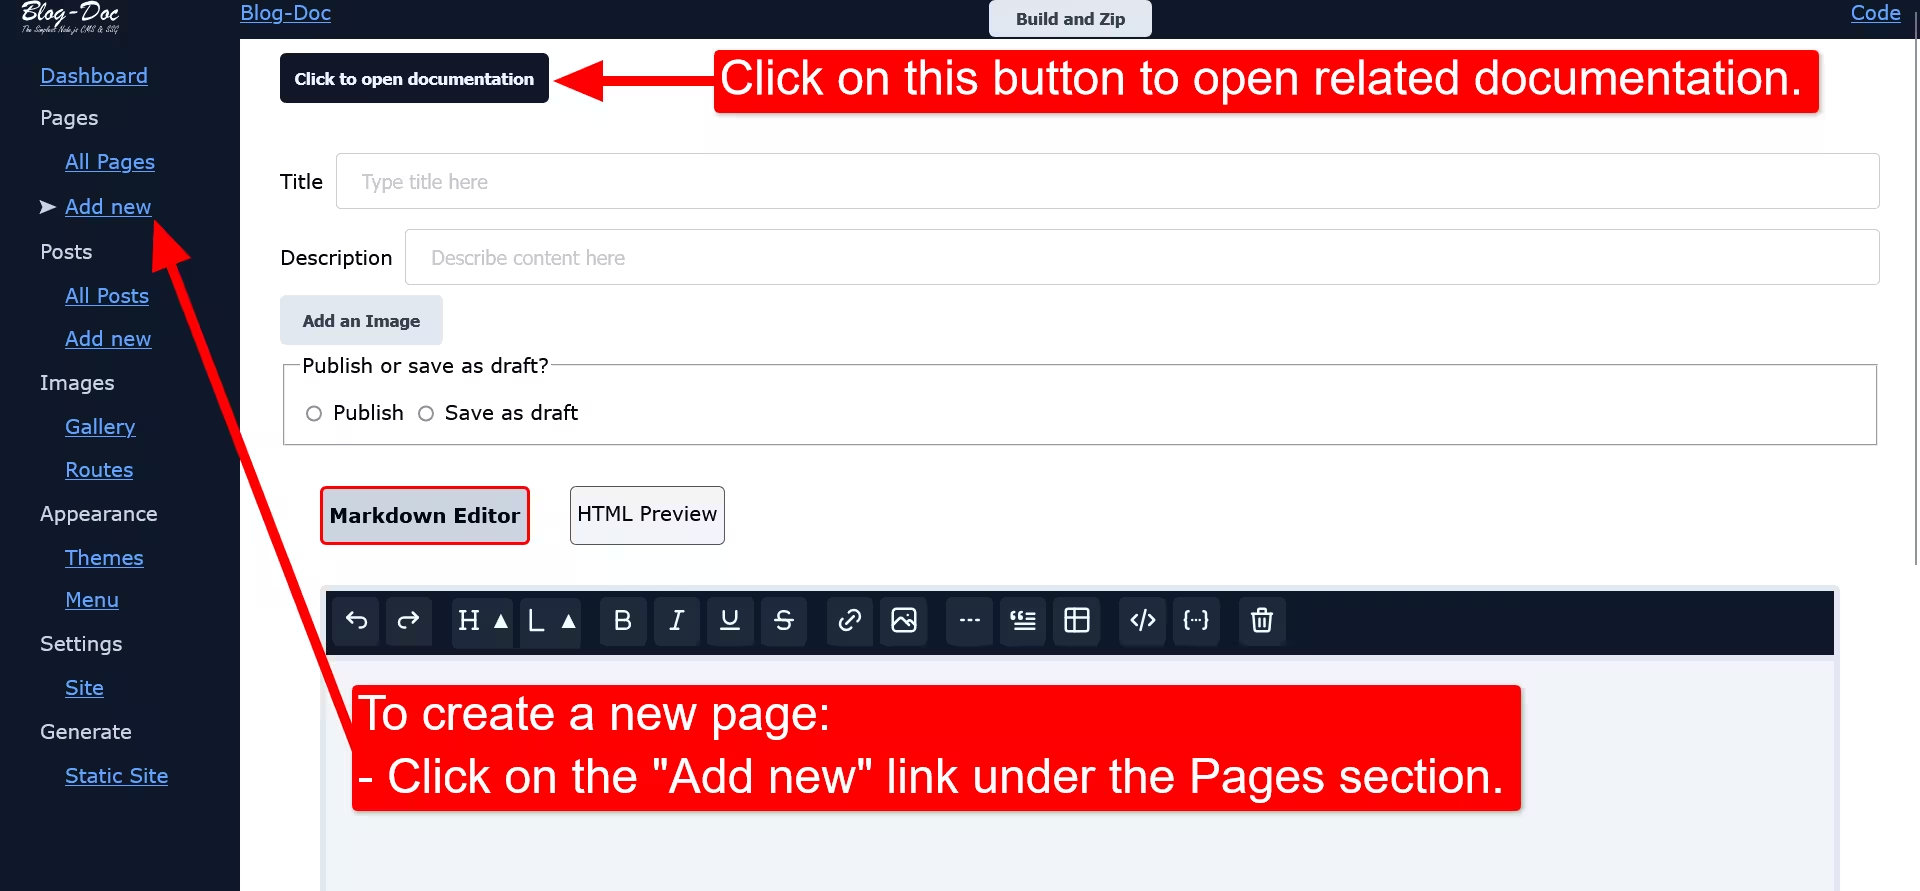
To create a page:
- Give your page a title in the "Title" field. This field is required!
- Describe your page's content in the "Description" field. This field is optional!
- Add an image to your page by clicking on the Add an Image button. This is optional but better for design.
- Start writing your page's content using Markdown.
- Click on the "Create new page" button after the "Markdown Editor" to create your page.
Congrats! You've just created your first page with Blog-Doc!
Posts
Posts in Blog-Doc are used to create chronological content like articles in newspapers. Use them to create your blog and share your awesome experiences and knowledge with the world!
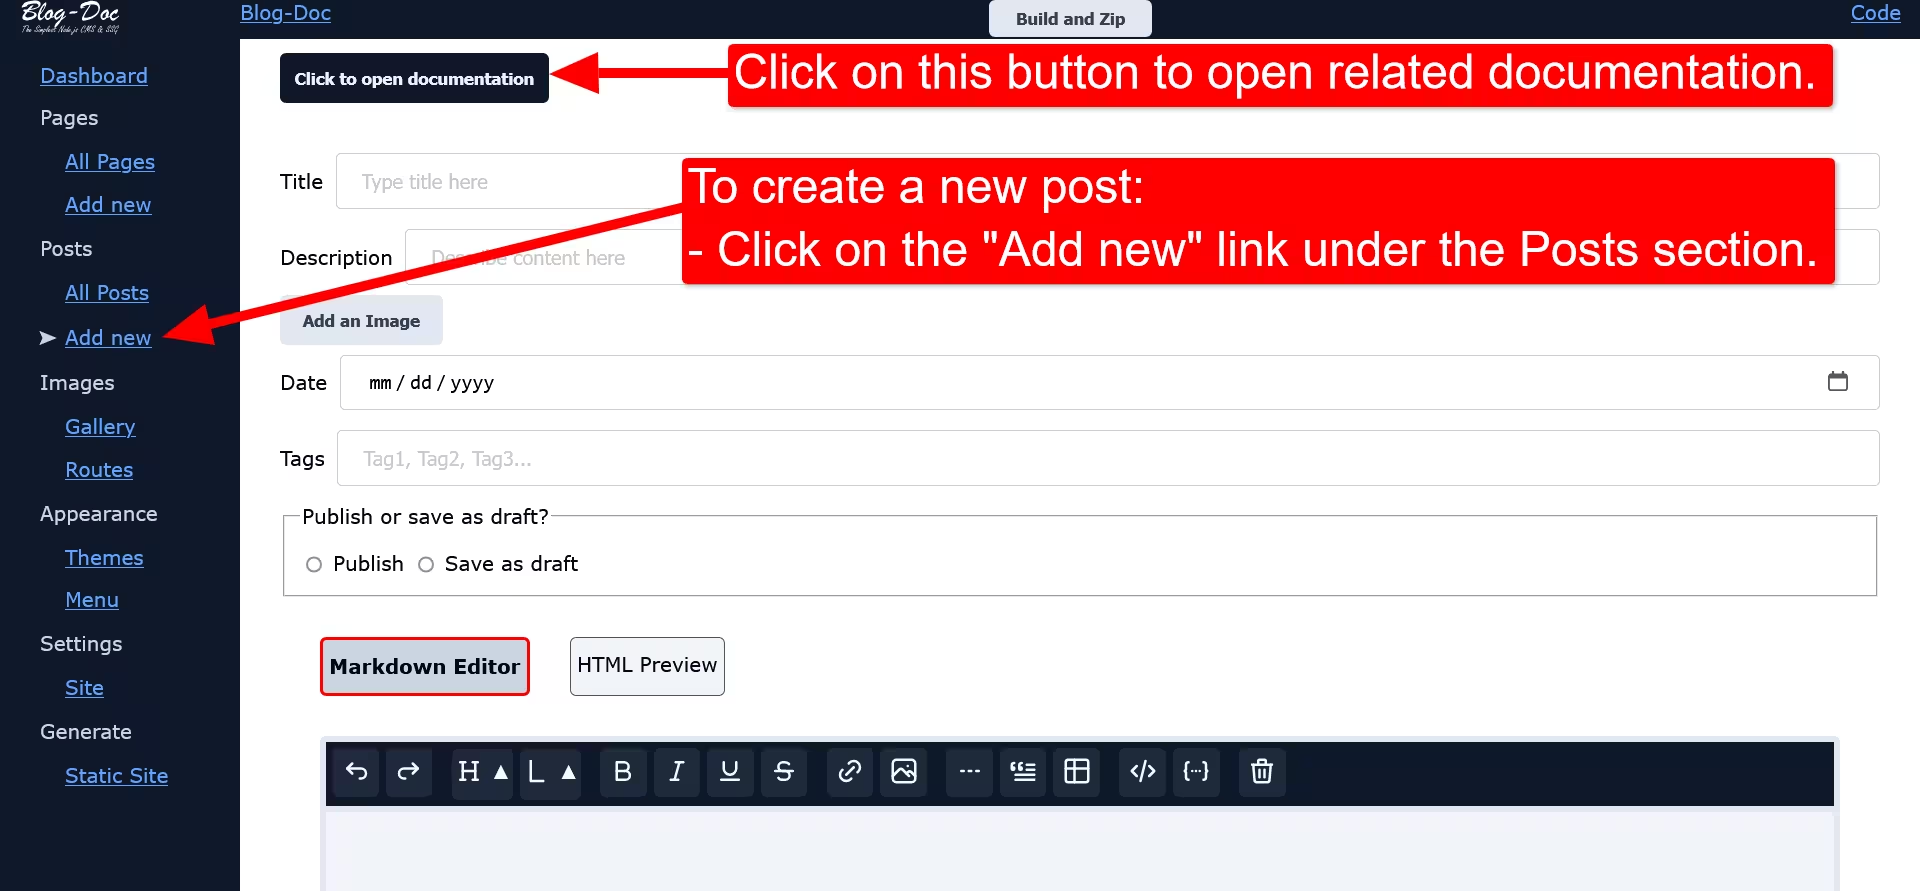
Access the administration interface and click on the Add new link under the Posts section, then follow those simple steps to create a post:
- Give your post a title in the "Title" field. This field is required!
- Describe your post's content in the "Description" field. This field is optional but very important for SEO after publishing your static site on the Web.
- Add an image to your post by clicking on the Add an Image button. This is optional but better for design.
- Select the publishing date of your post by clicking on the little calender in the "Date" field. This field is required!
- Add a tag or more to your post in the "tags" field. Multiple tags are separated by a comma
",". This field is optional but better to categorize your posts. - Start writing your post's content using Markdown.
- Click on the "Create new post" button after the "Markdown Editor" to create your page.
Congrats! You've just created your first post with Blog-Doc!
Drafts
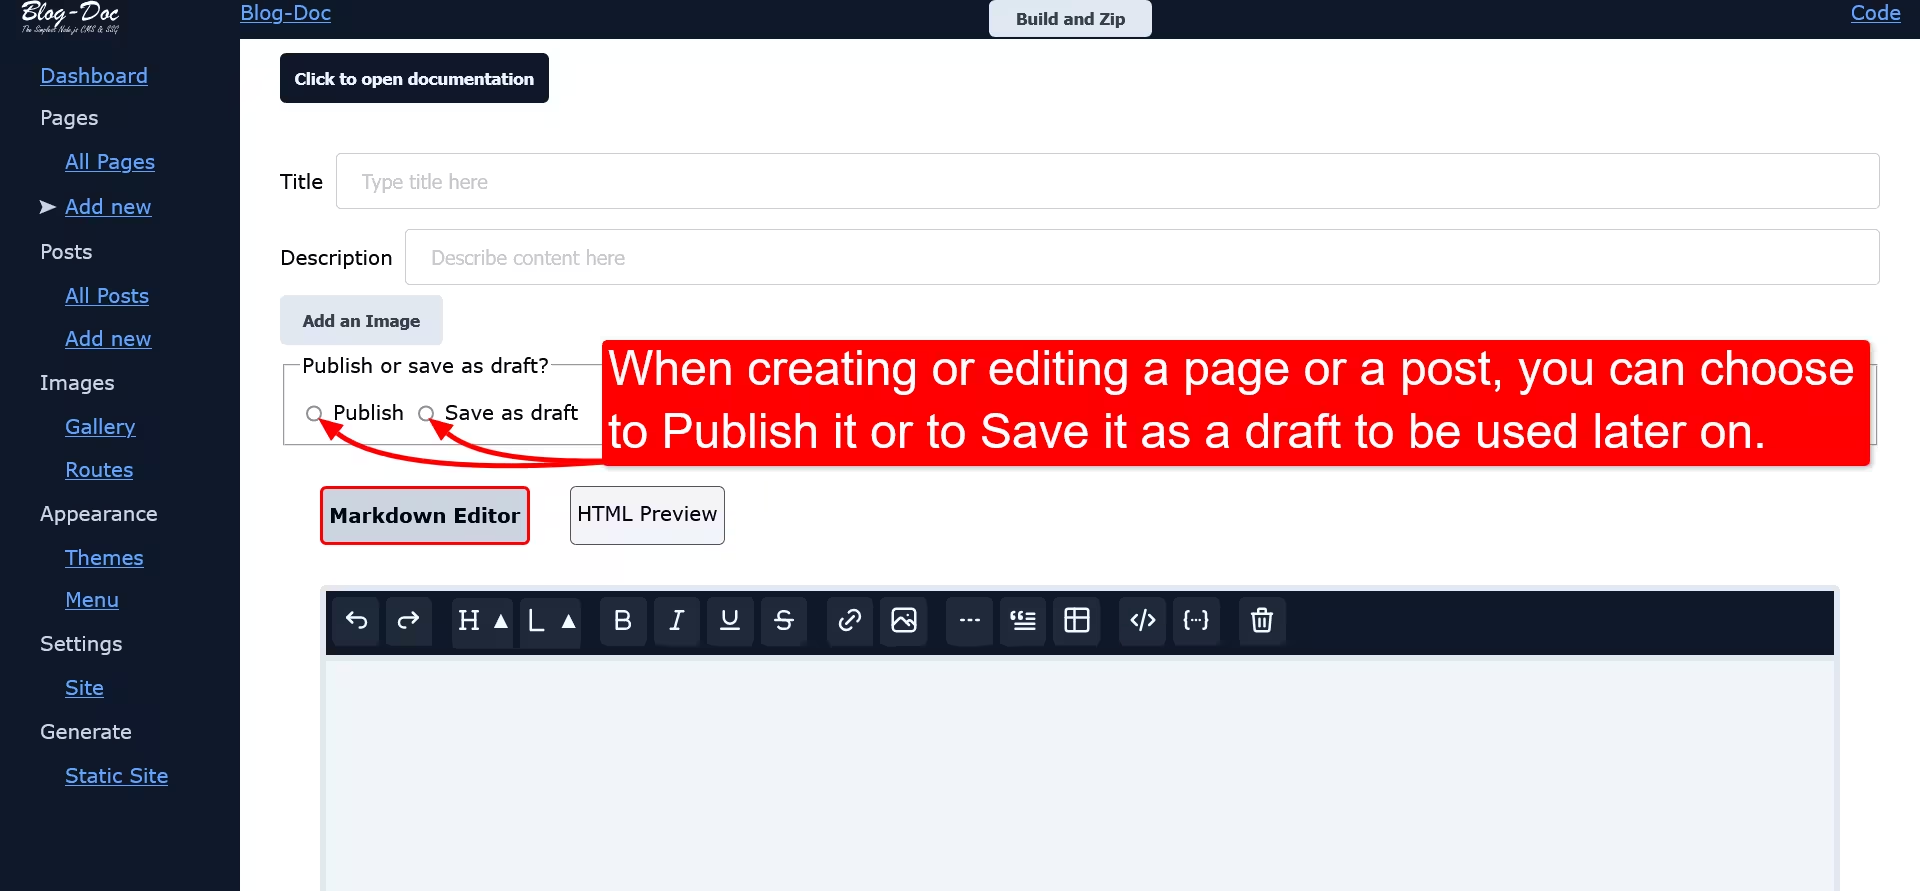
When you create/edit a page or a post, you can choose to publish it wright away or save it as a draft for later use.
Published page or post will be available on the front-end of the application and in the generated static site after running a build.
You can choose to save your page or post as a draft while creating/editing it by clicking on Save as draft in Publish or save as draft?
To preview your unpublished page or post click on the "Create new ..." button, you'll be redirected to a preview of your page or post to see how it will look like in the application once published.
Metadata
Another method of creating pages and posts is to create the files manually from the backend.
Under the views directory you'll find a pages and posts folders.
The pages folder holds the pages files and the posts folder holds the posts files.
📂blog-doc → root folder
└── 📂views
  ├── 📂pages
  │  └── pages' files
  ├── 📂posts
  │  └── posts' files
Nota Bene: The above structure omits other folders and files to simplify the tree's view!
Pages metadata
To write a page manually, create a Markdown file in the pages folder.
The extension of a Markdown file is .md, for example my-page.md.
Copy the following block and paste it at the top of your Markdown file.
If you are using VS Code, you don't need to copy and paste the block, press Ctrl+spacebar and choose Blog-Doc Page Frontmatter:
---
title: Your Page Title
description: A brief description of your page
featuredImage: "/static/images/"
published: true
---
- The
titleproperty is the title you want to give to your page.- Providing a value in front of
title:is REQUIRED! - Giving your page the same title as its file name is better for SEO.
- Providing a value in front of
- The
descriptionproperty is the description of your page's content.- Providing a value in front of
description:is optional. - The description value is important for SEO.
- If you don't provide a value, remove the
description:line entirely!
- Providing a value in front of
- The
featuredImageproperty is the featured image attached to your page.- Providing a value in front of
featuredImage:is optional. - Put the featured image under the static directory in the images folder.
- The value looks like:
"/static/images/my-page-image.png" - Or fetch an external image:
"https://link-to-an-image.com" - If you don't provide a value, remove the
featuredImage:line entirely!
- Providing a value in front of
- The
publishedproperty indicates if your page should be published or saved as a draft.- Providing a value in front of
published:is REQUIRED! - The value must be
trueorfalse - A value of
truewill publish your page. - A value of
falsewill save your page as a draft.
- Providing a value in front of
Start writing the content of your page, using Markdown, after the last triple-dashed line --- under the block.
Leave an empty line between the block and the beginning of your page. Once done save your file.
Congrats! You've just created your first page from the backend!
Posts metadata
To write a post manually, create a Markdown file in the posts folder.
The extension of a Markdown file is .md, for example my-post.md.
Copy the following block and paste it at the top of your Markdown file.
If you are using VS Code, you don't need to copy and paste the block, press Ctrl+spacebar and choose Blog-Doc Post Frontmatter:
---
title: Your Post Title
publish_date: 2024-08-08
description: A brief description of your post
featuredImage: "/static/images/an_image.png"
tags: [Development, Node.js, Markdown]
published: true
---
- The
titleproperty is the title you want to give to your post.- Providing a value in front of
title:is REQUIRED! - Giving your post the same title as its file name is better for SEO.
- Providing a value in front of
- The
publish_dateproperty is automatically generated and refers to today's date.- Providing a value in front of
date:is REQUIRED! - The date's value MUST be formatted as
YYYY-MM-DD - Four-digit year-two-digit month-two-digit day
- Providing a value in front of
- The
descriptionproperty is the description of your post's content.- Providing a value in front of
description:is optional. - The description value is important for SEO.
- If you don't provide a value, remove the
description:line entirely!
- Providing a value in front of
- The
featuredImageproperty is the featured image attached to your post.- Providing a value in front of
featuredImage:is optional. - Put the featured image under the static directory in the images folder.
- The value looks like:
"/static/images/my-post-image.png" - Or fetch an external image:
"https://link-to-an-image.com" - If you don't provide a value, remove the
featuredImage:line entirely!
- Providing a value in front of
- The
tagsproperty is an array of tag(s) to which your post is associated.- Providing a value in front of
tags:is optional. - A single tag value looks like: [Tag]
- Multiple tags are separated by commas: [Tag1, Tag2, Tag3,...]
- If you don't want to tag your post, remove the
tags:line entirely!
- Providing a value in front of
- The
publishedproperty indicates if your post should be published or saved as a draft.- Providing a value in front of
published:is REQUIRED! - The value must be
trueorfalse - A value of
truewill publish your post. - A value of
falsewill save your post as a draft.
- Providing a value in front of
Start writing the content of your post, using Markdown, after the last triple-dashed line --- under the block.
Leave an empty line between the block and the beginning of your post. Once done save your file.
Congrats! You've just created your first post from the backend!
Nota Bene
It's easier and safer to create and update your pages and posts from the administration interface.