Admin interface
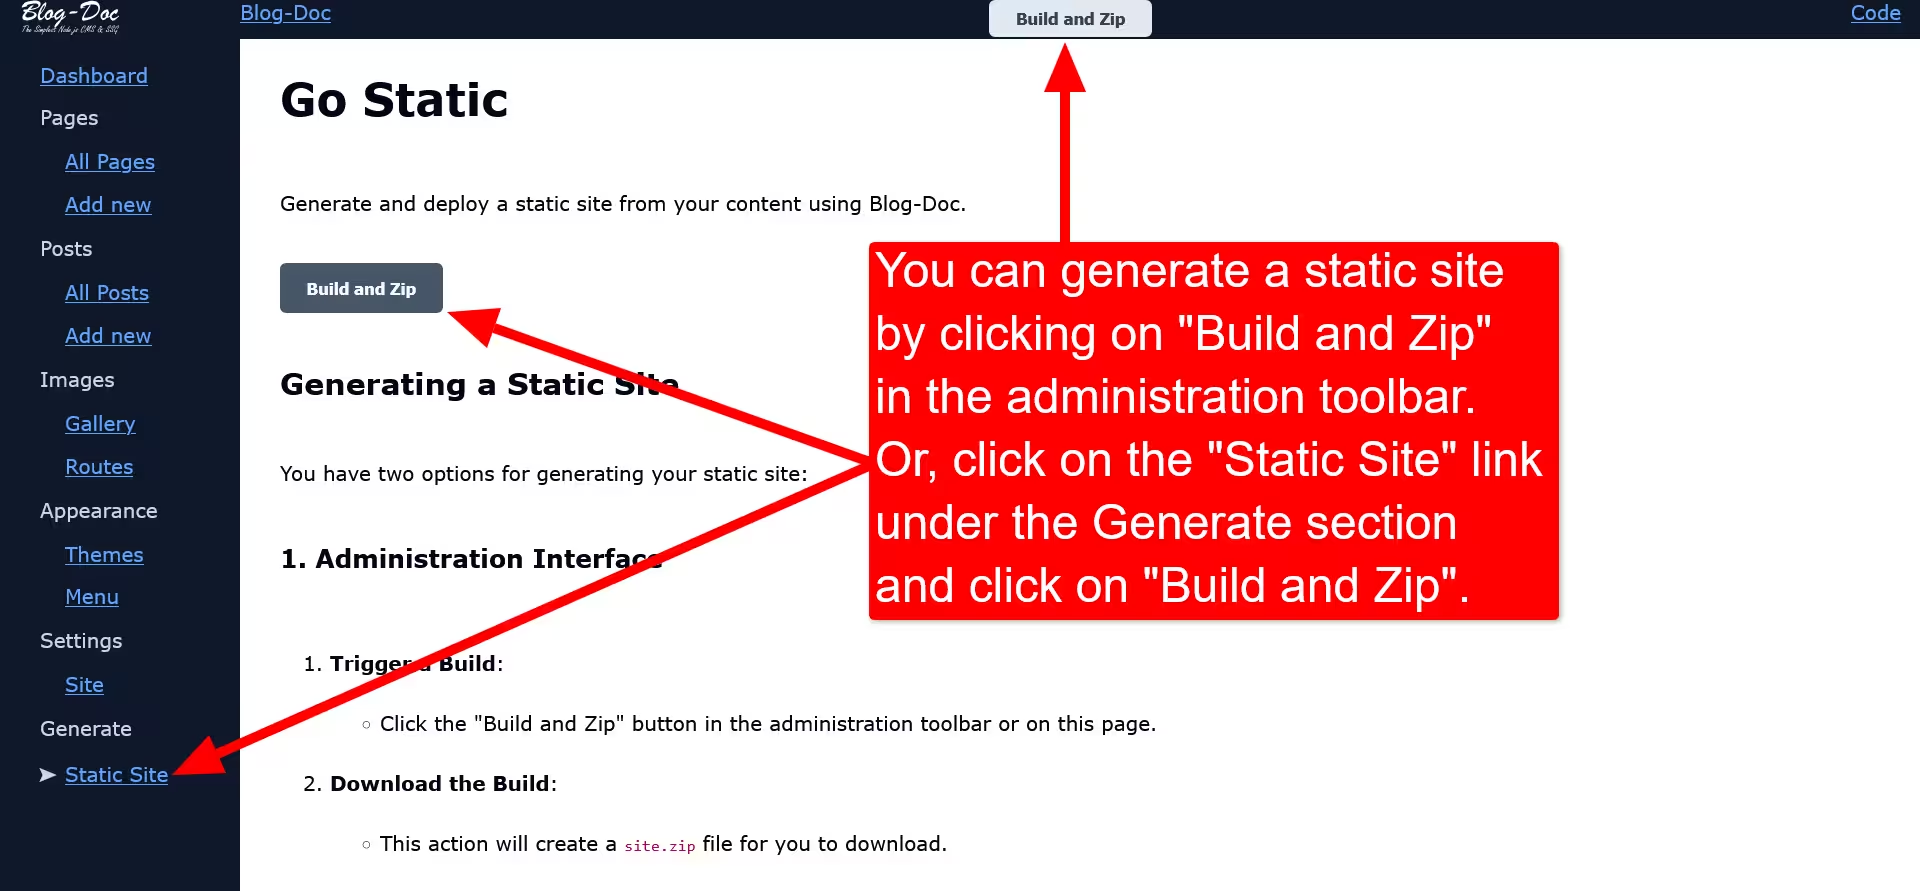
You can use the administration interface to generate a static site out of your created content with Blog-Doc by following those simple steps:
- Access the administration interface → Click the
Admin ⚡link. - From the administration homepage → Click the
Build and Zipbutton in the administration toolbar. - Or Click the
Static Sitelink in theGenerateSection → Click theBuild and Zipbutton in the page. - A static site is generated → Download the
site.zipfile to your disk. - Extract
site.zipand open the extracted folder with you IDE. - Preview your static site → Launch the site from the server of your IDE.

Terminal
Alternatively, you can use the terminal to generate a static site:
- Open Blog-Doc with your IDE.
- Type the following command in the terminal:
npm run build
- A
_sitefolder is created in Blog-Doc at the top. - Open the
_sitefolder with your IDE. - Preview your static site → Launch the site from the server of your IDE.
Nota Bene
When you run a build from the administration interface, you can rename the created site.zip to another name before saving it to your disk. Keep the .zip extension and rename site to whatever you like.
If you run a build from the administration interface and save the created file in the same location on your disk with the same name as a previous build, the previous content will be replaced by the actual content in the application.
Each time your run a build from the administration interface or the terminal, the previous content of the _site folder is replaced by the actual content in the application.

